Dashing Girl Photo Effect
In this photoshop tutorial we will learn how to use a mask to separate subject from the surrounding pixels.
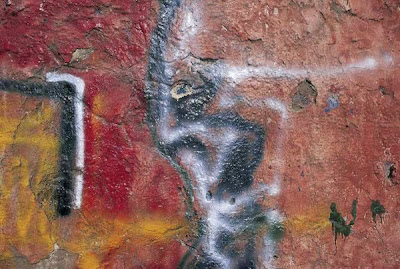
This image can be found at Photos.com.

And this image is also from Photos.com that has a definite grunge feel to it.
Select the entire wall image, copy it and paste it into it is own layer in the document with the model. The second image in this case is wider than it is high, so some rotating and transforming needs to take place. With the Transform tools, first rotate the wall layer 90 degrees CCW, then transform it so that it covers the entire layer.
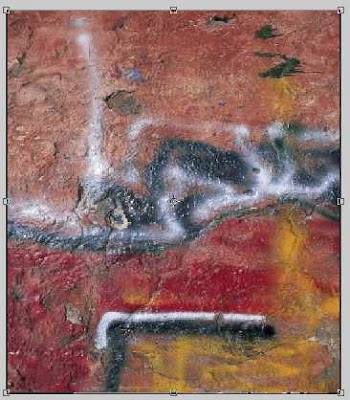
Accept the transformation.
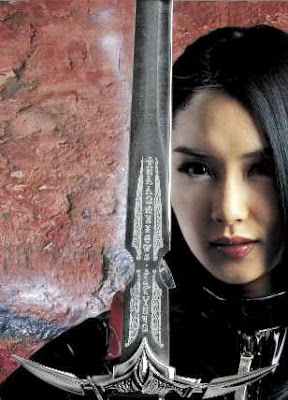
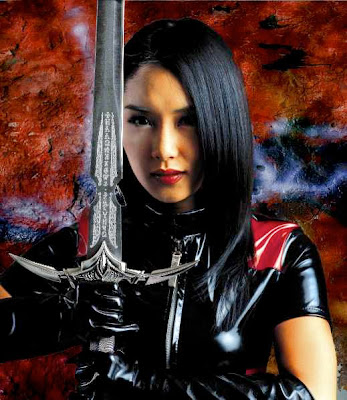
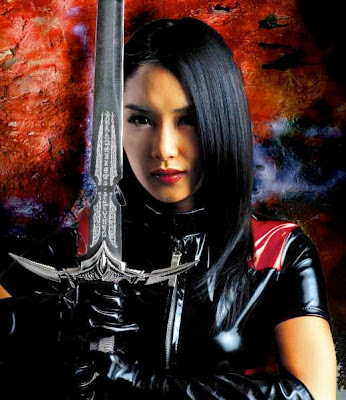
Neat, a layer containing the model needs to be placed above the new background, or wall, layer. Copy the Background layer and move it above the layer with the wall. Using your favorite selection tool, select the gray areas behind the model. In this instance, simply used the Magic Wand tool. Next, create a mask for the layer. In the mask fill the selected background with black, select Inverse and fill the model area with white.
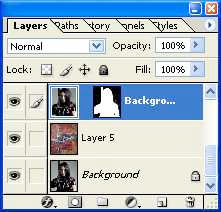
Your image will look something like that seen here. Don't worry that the edges are
imperfect… you can clean those up shortly.
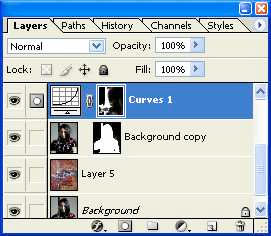
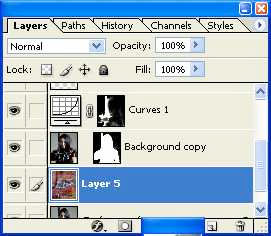
Let's put some shine on that sword. We can do this a couple ways. First, create a Curves adjustment layer and create a curve similar to that seen here.
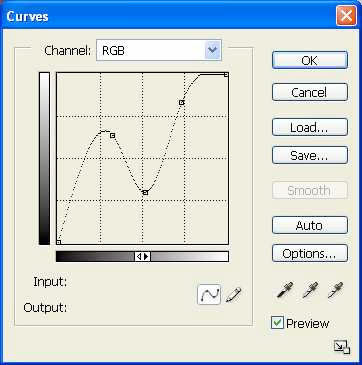
Set Black as the foreground color and, in the Mask for the Curves adjustment layer, paint over those areas that you do not want affected by the curve. For instance, the reflections off the uniform, the skin, the red areas of the costume and so forth.
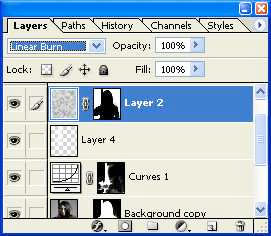
The sword can be made brighter by creating a new layer above the Curves layer and setting the Blend Mode for the layer to Soft Light. Paint over the blade with white. You may also want to make it appear the reflection off the blade is lightening the woman's face also.

For the next part of the project, I want to darken the overall image but with a subtle hint of grunge. To do this I’m setting the foreground color to a median gray and the background color to white. Created a new layer and run the Clouds filter on the layer. I don't really want this to affect my model, but just the background. To do this Command/Control+Click the Model layer's mask. Create a mask for the clouds layer and ensure the model area is filled with black in the mask and white over the rest. Set the Blending Mode for this layer to Color Burn.
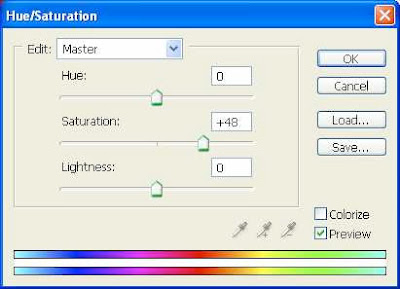
For this piece I really want to thicken the color, so creating a Hue/Saturation adjustment layer at the top of the layer stack and increasing the Saturation to +48. I will leave the Hue and Lightness sliders alone.
If you still have some light areas showing around the model that may not have been hid by the mask, select the model layer and use the Burn tool to darken the edges.
The Burn tool can also be used to add some shadow to the new background. My settings are as follows:

Selecting the new background layer, I am running the Burn tool to the left of the sword and along the left edge of the model to give some shading to the wall.
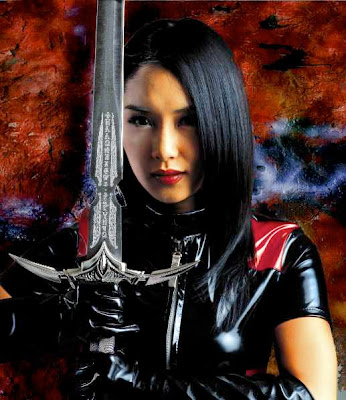
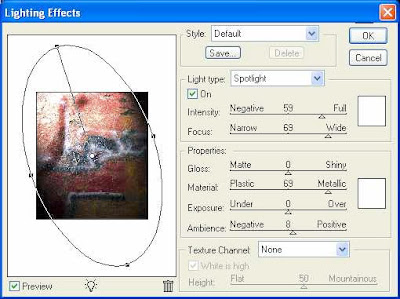
As a final touch, I’ll use the Lighting Effects filter on the wall layer.
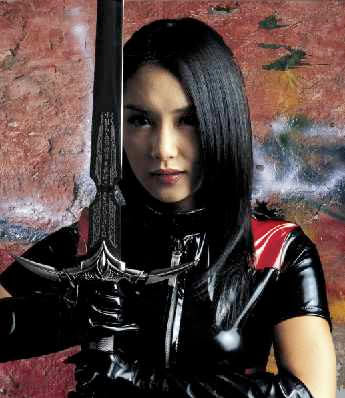
Dashing Girl:
This image can be found at Photos.com.

And this image is also from Photos.com that has a definite grunge feel to it.

Select the entire wall image, copy it and paste it into it is own layer in the document with the model. The second image in this case is wider than it is high, so some rotating and transforming needs to take place. With the Transform tools, first rotate the wall layer 90 degrees CCW, then transform it so that it covers the entire layer.

Accept the transformation.
Neat, a layer containing the model needs to be placed above the new background, or wall, layer. Copy the Background layer and move it above the layer with the wall. Using your favorite selection tool, select the gray areas behind the model. In this instance, simply used the Magic Wand tool. Next, create a mask for the layer. In the mask fill the selected background with black, select Inverse and fill the model area with white.

Your image will look something like that seen here. Don't worry that the edges are
imperfect… you can clean those up shortly.

Let's put some shine on that sword. We can do this a couple ways. First, create a Curves adjustment layer and create a curve similar to that seen here.

Set Black as the foreground color and, in the Mask for the Curves adjustment layer, paint over those areas that you do not want affected by the curve. For instance, the reflections off the uniform, the skin, the red areas of the costume and so forth.

The sword can be made brighter by creating a new layer above the Curves layer and setting the Blend Mode for the layer to Soft Light. Paint over the blade with white. You may also want to make it appear the reflection off the blade is lightening the woman's face also.

For the next part of the project, I want to darken the overall image but with a subtle hint of grunge. To do this I’m setting the foreground color to a median gray and the background color to white. Created a new layer and run the Clouds filter on the layer. I don't really want this to affect my model, but just the background. To do this Command/Control+Click the Model layer's mask. Create a mask for the clouds layer and ensure the model area is filled with black in the mask and white over the rest. Set the Blending Mode for this layer to Color Burn.


For this piece I really want to thicken the color, so creating a Hue/Saturation adjustment layer at the top of the layer stack and increasing the Saturation to +48. I will leave the Hue and Lightness sliders alone.

If you still have some light areas showing around the model that may not have been hid by the mask, select the model layer and use the Burn tool to darken the edges.

The Burn tool can also be used to add some shadow to the new background. My settings are as follows:

Selecting the new background layer, I am running the Burn tool to the left of the sword and along the left edge of the model to give some shading to the wall.


As a final touch, I’ll use the Lighting Effects filter on the wall layer.

Dashing Girl:

posted by Blog @ 12:12 AM
![]()
0 Comments:
Post a Comment
Subscribe to Post Comments [Atom]
<< Home