Water Text
Find out how to create water splat text effect.
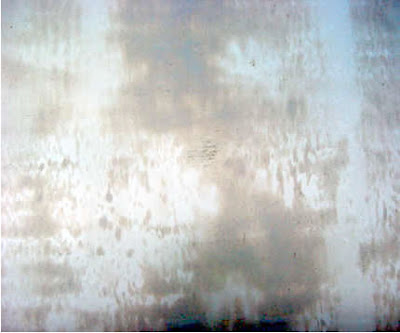
1) To start, find a picture to serve as a background. For this example I am using a sheet of metal, but concrete would work nicely also.
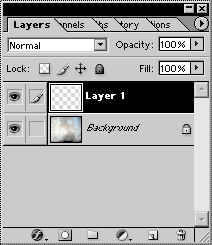
2) Create a new layer.
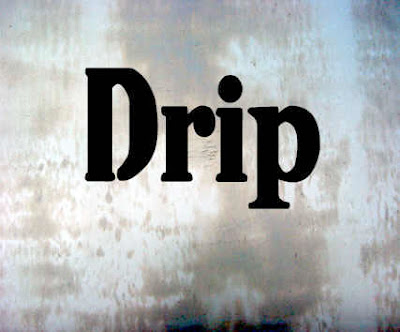
3) Select the Type Mask Tool. Type your selection in the new layer.
Fill the selection with Black, and deselect.
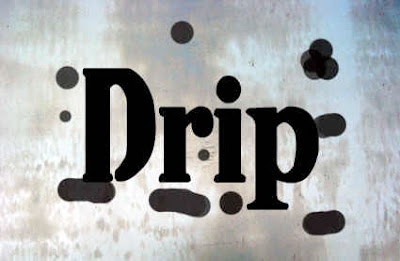
4) Select the Paint Brush tool. Use settings similar to those in the capture below.

5) Paint a few spots around the text.
6) This part is fairly important. Minimize the current image, and create a new image with the same dimensions. Fill it with black. Paint some wide, white swaths through the black using a fat, feathered brush. Go to Filter>Distort>Twirl and twirl the image with a setting of 100 or so. Then go to Filter>Distort>ZigZag, choose out from center, and add some ripples. Try to get an image
close to the one seen here:
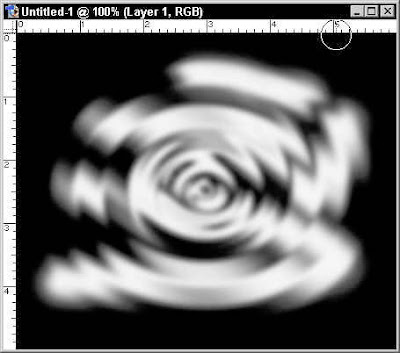
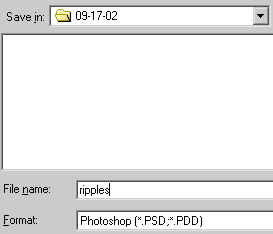
Save this image as a .psd file somewhere on your computer. If you are familiar with displacement maps, then you know where I’m going with this.
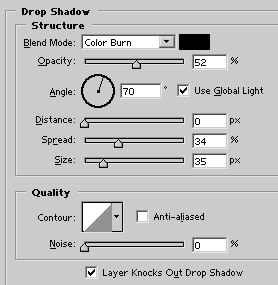
7) Go back to you original image and select the text layer. We are going to apply a few settings using the Layer Styles dialog box, so click the ‘Add a Style’ icon on the bottom of the layers palette. Let’s start with a Drop Shadow:
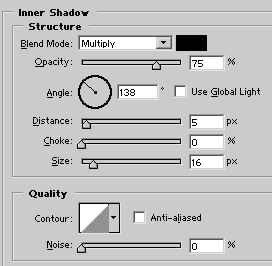
Inner Shadow:
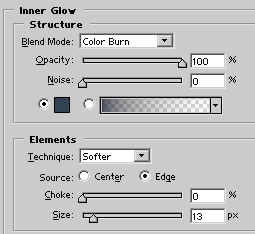
Inner Glow:
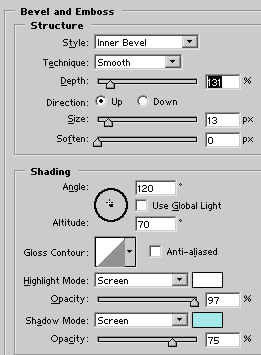
Bevel/Emboss:
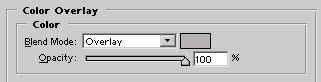
Color Overlay:
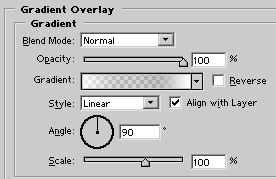
Finally, a gradient overlay:
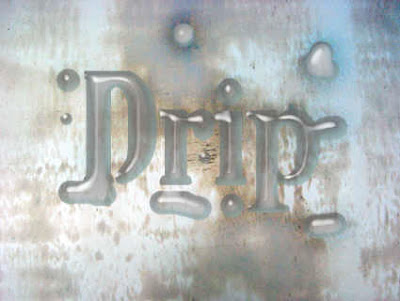
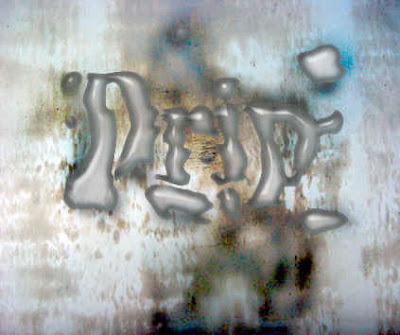
Here we are:
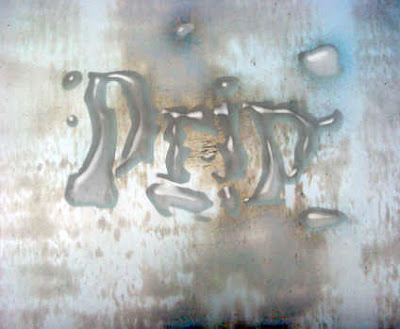
8) Now go to Filter>Distort>Displace, with the settings below.

Load the displacement map you created before.

Here’s:
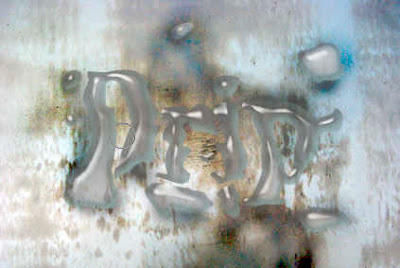
9) Let’s work on that background a bit. As the type is wet, we need to darken the area around the splash marks a bit. The Burn tool will help out nicely. Click the background layer and select the burn tool.

Set the tool up with the following settings in the options bar:

10) Using the burn tool, darken the shadows around the type and water spots.
11) Create a new layer.

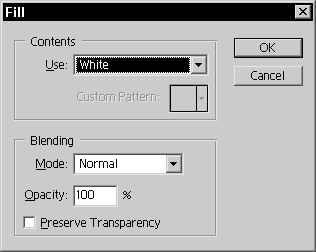
12) Cmd/CTRL+Click the type layer to bring up a selection. Fill the selection on the new layer with white.
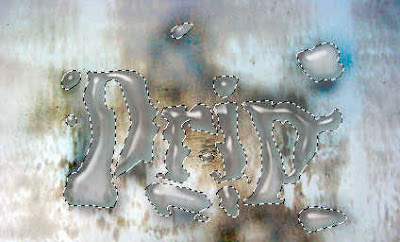
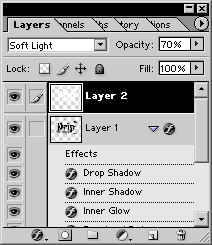
13) Set the Blending mode for this layer to Soft Light, and the Opacity to 70%.
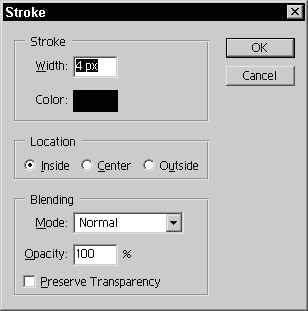
14) Create a new layer. With the selection still active, hit D to reset the default colors (Black=Foreground, White=Background) Go to Edit>Stroke, and stroke the INSIDE of the selection by 4 pixels or so.
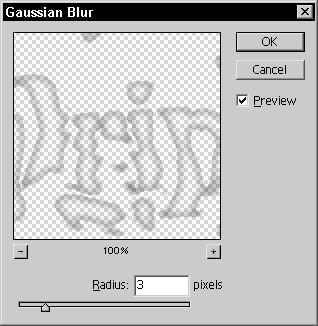
15) Go to Filter>Blur>Gaussian Blur and apply one with a setting of 3 or so.
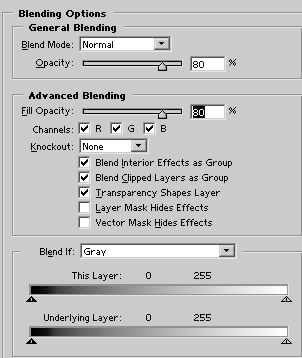
16) Let’s work on the transparency of the image just a bit. Select the type layer, and open the Layer Styles dialog box again. At the top, click on Blending Options. Try applying the following settings:
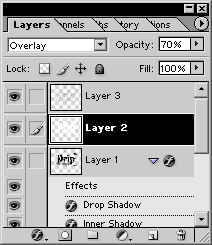
17) Now select the white layer just above the type. Change the Blending Mode to Overlay to see if this helps:
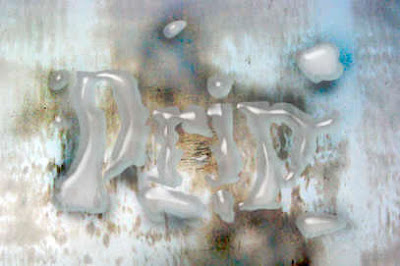
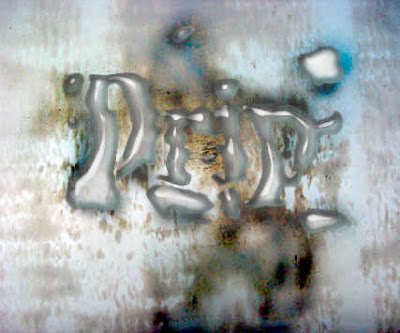
Final
1) To start, find a picture to serve as a background. For this example I am using a sheet of metal, but concrete would work nicely also.

2) Create a new layer.

3) Select the Type Mask Tool. Type your selection in the new layer.
Fill the selection with Black, and deselect.

4) Select the Paint Brush tool. Use settings similar to those in the capture below.

5) Paint a few spots around the text.

6) This part is fairly important. Minimize the current image, and create a new image with the same dimensions. Fill it with black. Paint some wide, white swaths through the black using a fat, feathered brush. Go to Filter>Distort>Twirl and twirl the image with a setting of 100 or so. Then go to Filter>Distort>ZigZag, choose out from center, and add some ripples. Try to get an image
close to the one seen here:

Save this image as a .psd file somewhere on your computer. If you are familiar with displacement maps, then you know where I’m going with this.

7) Go back to you original image and select the text layer. We are going to apply a few settings using the Layer Styles dialog box, so click the ‘Add a Style’ icon on the bottom of the layers palette. Let’s start with a Drop Shadow:

Inner Shadow:

Inner Glow:

Bevel/Emboss:

Color Overlay:

Finally, a gradient overlay:

Here we are:

8) Now go to Filter>Distort>Displace, with the settings below.

Load the displacement map you created before.

Here’s:

9) Let’s work on that background a bit. As the type is wet, we need to darken the area around the splash marks a bit. The Burn tool will help out nicely. Click the background layer and select the burn tool.

Set the tool up with the following settings in the options bar:

10) Using the burn tool, darken the shadows around the type and water spots.

11) Create a new layer.

12) Cmd/CTRL+Click the type layer to bring up a selection. Fill the selection on the new layer with white.


13) Set the Blending mode for this layer to Soft Light, and the Opacity to 70%.


14) Create a new layer. With the selection still active, hit D to reset the default colors (Black=Foreground, White=Background) Go to Edit>Stroke, and stroke the INSIDE of the selection by 4 pixels or so.

15) Go to Filter>Blur>Gaussian Blur and apply one with a setting of 3 or so.


16) Let’s work on the transparency of the image just a bit. Select the type layer, and open the Layer Styles dialog box again. At the top, click on Blending Options. Try applying the following settings:

17) Now select the white layer just above the type. Change the Blending Mode to Overlay to see if this helps:

Final

posted by Blog @ 3:44 AM
![]()
0 Comments:
Post a Comment
Subscribe to Post Comments [Atom]
<< Home