Easy Background
In this photoshop tutorial we are going to create trendy background for photos.
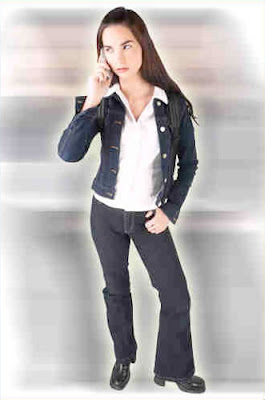
Step 1:
Make a selection around your image using Channels, Extract, magic wand, pen or lasso, whatever method you prefer.

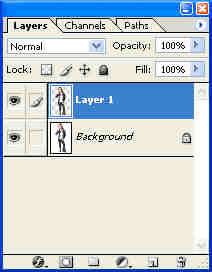
Step 2:
Copy the object to a new layer by pressing Ctrl+J (If the background is transparent, merge it with a while layer, so your layers palette looks like the illustration shown)
Step 3:
Choose the background layer Choose Filter> Blur> Motion Blur, use a large setting:

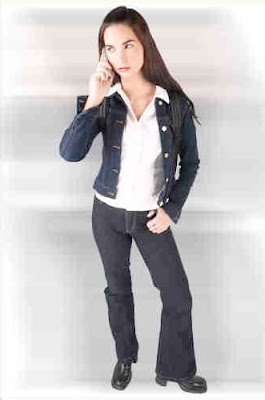
Step 4:
Your image should now look something like this
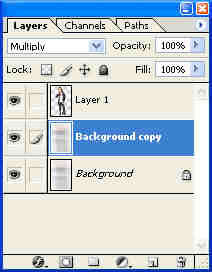
Step 5:
To enhance the effect, duplicate the blurred layer and switch to Multiply mode
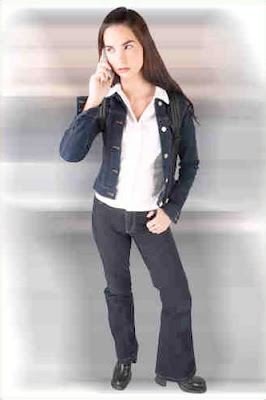
Step 6:
You should now have something with a bit more definition as shown:
Step 7:
Add an outer glow as shown. Choose the layer styles by clicking the little “f” at the bottom of the layers palette and selecting Outer Glow, Change the color to white and increase the size until you get something that resembles the image show here.
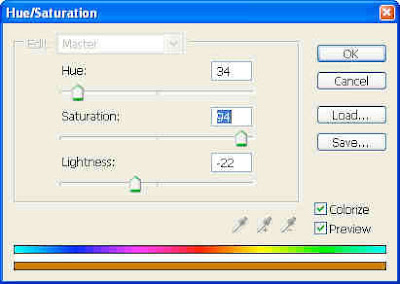
Step 8:
(optional) Create a new Hue/Saturation adjustment layer, right above the background layers and below the image layer.
Click the little Circle that's 1/2 black and 1/2 white on the bottom of the layers palette, Choose Hue/Saturation In the dialog box: Click colorize, move the saturation way up and adjust the hue until you get a shade you like. Reduce the lightness to add some color to the white areas
Click ok
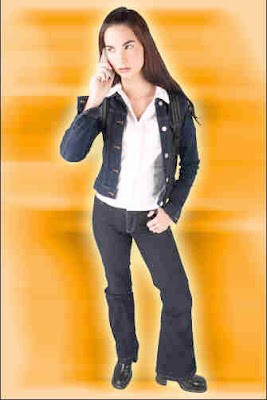
Step 9:
(optional) And there you have it! One ultra cool and trendy background, ultra quick and easy.
Step 1:
Make a selection around your image using Channels, Extract, magic wand, pen or lasso, whatever method you prefer.

Step 2:
Copy the object to a new layer by pressing Ctrl+J (If the background is transparent, merge it with a while layer, so your layers palette looks like the illustration shown)

Step 3:
Choose the background layer Choose Filter> Blur> Motion Blur, use a large setting:

Step 4:
Your image should now look something like this

Step 5:
To enhance the effect, duplicate the blurred layer and switch to Multiply mode

Step 6:
You should now have something with a bit more definition as shown:

Step 7:
Add an outer glow as shown. Choose the layer styles by clicking the little “f” at the bottom of the layers palette and selecting Outer Glow, Change the color to white and increase the size until you get something that resembles the image show here.

Step 8:
(optional) Create a new Hue/Saturation adjustment layer, right above the background layers and below the image layer.
Click the little Circle that's 1/2 black and 1/2 white on the bottom of the layers palette, Choose Hue/Saturation In the dialog box: Click colorize, move the saturation way up and adjust the hue until you get a shade you like. Reduce the lightness to add some color to the white areas
Click ok

Step 9:
(optional) And there you have it! One ultra cool and trendy background, ultra quick and easy.

posted by Blog @ 3:44 AM
![]()
0 Comments:
Post a Comment
Subscribe to Post Comments [Atom]
<< Home