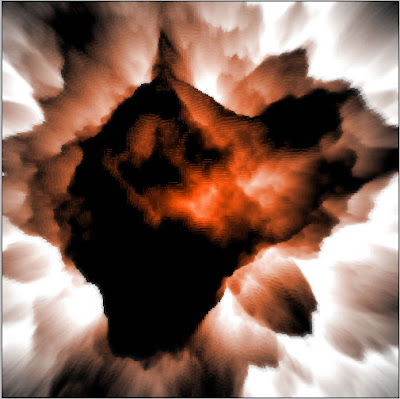
Exploding Planet
Step 1:
Create a new document.
Press D to reset the Color Palette. Rename the existing layer "Layer 1".
Step 2:
Go to Filter> Render> Clouds.
Then next go to Filter> Render> Difference Clouds apply four times.
Step 3:
Now set the levels, go to Image> Adjustments> Levels (Ctrl+L). Use the following setting:
then Filter> Stylize> Extrude with this settings:
After this go to Image> Adjustments> Invert (Ctrl+I).
Step 4:
Duplicate layer 'Layer 1" by right clicking the layer in the Layer Palette and clicking Duplicate Layer.
Rename the new layer 'Layer 2'.
Select 'Layer 2'on the layer palette and go to Filter> Blur> Radial Blur with the following setting:
Step 5:
Add a Layer Mask to layer 'Layer 2' by clicking on the Add Layer Mast button on the bottom of the Layer Palette.
Click on the Gradient tool and choose the 'Radial Gradient'. Check 'Reverse'. Click the middle of the image and drag out to the corner of the image to make a nice black to white circle gradient in your layer mask.
Step 6:
Add some colors, select 'Layer 1' and go to Image> Adjustments> Hue/Saturation (Ctrl+U) and use the followig setting:
Planet Explosion

1 Comments:
At June 22, 2022 at 2:33 PM , Bobby M said...
Hi great reading your blogg
Post a Comment
Subscribe to Post Comments [Atom]
<< Home